Thursday, October 9, 2014

Maybelline Super Stay 24 hour Color Lipsticks

 I have already mentioned these lipsticks in one of my previous reviews so I am not going to write it all over again. As I said before, these lipsticks are same kind as L'Oréal's Infallible and Max Factor's Lipfinity. The whole point is that these lipstick are not smudging, staining nor moving and once you apply them they WILL stay on until you remove it. The formula is fluid, application is similar to lip gloss and it dries on lips into matt finish. Down side is that it doesn't feel nice on lips when you try it first time - it is very very dry - but after some time you can get used to it. However, there is a balm on the other side of the lipstick which you should apply once the lipstick is totally dry. That makes it bit better. Also, taste of that balm is not one of my favourite.
Though after you try these kind of lipsticks you will see how nicely they stay on and you will never go back to common lipsticks any more..at least I didn't.
Another advantage of these lipsticks is that they are very pigmented and you can also layer them to achieve higher intensity. Mostly one layer is enough to cover up your natural lip color but if you wish to have darker or more intense color you can easily apply 2 layers.
I first start with filling my lips with surface of the applicator, then I outline them with very tip of the applicator. I wait till it's all dry and then I apply one more coat all over the lips. With darker and more intense colors I also use very precise small lip brush, I dip it into lipstick and I go over the edges of my lips to create very fine precise outline. Remember, more dark and intense color you are using, more precise you have to be because it will show. I also usually go bit over the natural line of my lips to make them appear bigger and fuller (which looks always better with using dark colors).
On the pictures below you will see my collection of Maybelline Super Stay 24 Lipsticks with numbers and colors - which are available in European market. Shades and numbers are different for US.
Maybelline Superstay 24 hour Color 585 Burgundy

Maybelline Superstay 24 hour Color 260 Wildberry

Maybelline Superstay 24 hour Color 510 Red Passion
Maybelline Superstay 24 hour Color 240 Plum Seduction

Maybelline Superstay 24 hour Color 615 Soft Taupe
Maybelline Superstay 24 hour Color 340 Absolute Plum


Wednesday, October 8, 2014

Rusty brown & pop of green (Sephora Endless Color Blockbuster palette)


I really love warm brown eye shadows but I was bit afraid to use it because it kind of made me looking sick. It is very tricky to use warm tone eye shadows for women with cool undertone skin. My skin is neutral though but it is still quite difficult for me to use warm browns. Therefore I have tried this look - warm brown with red undertones blended with orange and pop of cool green into inner corners to tone down all the warm colors, For this look I have used my Sephora Endless Color Blockbuster Collector’s Edition Makeup Palette which I get as a present quite some time ago but I actually haven't use it that much. I was always used to work with Sleek eye shadows which are extremely pigmented so these Sephora shadows seemed not that good to me. But now I have found out that these shadows are perfect for blending and I have to build the color up. You won't get much of a pigmentation just with one sweep (as you normally would with Sleek shadows) but you can layer the colors on top of each other which creates amazing effect which was very surprising for me. I think this look turned out very well and I am definitely going to use this Sephora palette much more often.


Products used:
Face:
GOSH Velvet touch foundation primer
L’Oréal True Match C2 Rose Vanilla
MAC Pro Longwear Concealer NC 20
Vichy Dermablend Setting Powder (loose)
Sleek Face Form Contouring and blush palette 373 Light
Sleek Suede 921

Eyes:
MAC Pro Longwear Concealer NC 20 (as a base)
Sephora Endless Color Blockbuster Collector’s Edition Makeup Palette 2010 L’Oréal Gel Intenza Eyeliner 01 PureBlack 
Catrice Kohl Kajal 040 White
L’Oréal Volume Million Lashes So Couture mascara

Brows:
Anastasia Beverly Hills Dipbrow Pomade Chocolate

Lips:
L’Oréal Infallible Lipstick 312 Incessant Russet
with rusty brown eyeshadow from Sephora palette on top of it:-)

Tuesday, October 7, 2014

How to fix damaged hair over night

Lots of us are from time to time experiencing damaged hair, split ends, dry and weak hair without shine and all those kind of unpleasant and irritating issues which keep us further and further from perfect healthy shiny hair.
The most common and most drastic solution is cutting. For women who want to have their hair long or as long as possible cutting is very undesirable. Therefore they keep on trying out new and different products on the market which promise to fix all those above mentioned problems.
I have tried several of those products but I haven't find anything extraordinary which would be worth of mentioning. I have found one product though, which really DOES make difference. And it is quite cheap and you can purchase it very easily. I am talking about SWEET ALMOND OIL.

One of the best qualities of almond oil is that is 100% natural - which means there are absolutely no chemicals added. ( I am using Sweet Almond Oil from Jacob Hooy), There are no fragrances, no alcohol, no silicone...absolutely nothing which would be in any kind not good for your hair. Therefore you can never go wrong with natural product in comparison with factory produced item.

Another advantage of almond oil is that it deep conditions hair and you will see the difference after only 1 use. Of course, if you will use it frequently, you will definitely get healthy shiny hair.
Although I am not talking about any miracle. If your hair is heavily damaged or "burned" from bleaching almond oil won't be able to make your hair absolutely healthy or extremely shiny.

HOW TO USE IT:
Depending on your hair (and hair damage) use it 1 till 4 times a week (you can even use it every day if you feel like you need to).
Warm it up in hot water (it is not necessary but it helps to penetrate the hair). Some people warm up oils in the microwave oven but I really don't recommend it ( there is a theory according to which micro waves are actually very bad for human body).
Brush your hair very good - there should not be any tangles.
Gently rub the oil on your hair - start about 10 cm from your roots and work your way down. You can put the oil also in your hair roots and massage your scalp if you have dry skin as well. I personally don't do it because my hair tends to get quite oily. I apply the oil only where is my hair damaged.
Be very generous, apply as much as you can. Your hair should be soaked with oil. Then you can braid your hair or tie it in a bun or do what you're most comfortable with and leave it in for 24 hours or longer if you like to. I mostly apply the oil in the evening and I leave it over night.
Then wash your hair with shampoo and apply conditioner as you normally would.

After I tried this almond oil treatment I could see the difference right away. Of course, my hair wasn't damaged too badly, but I had split ends and bottom section of my hair was very dry, not shiny and I could feel that my hair has lost elasticity. After 24 hour oil treatment my hair felt much healthier, shiny and was much easier to brush it. I am using this treatment approximately 2 - 3 times a month just to keep it healthy, shiny and to give it an extra boost of vitamins and moisture.

For more information about benefits of almond oil click here


Orange cut crease

This look is slightly more dramatic, very appropriate for party's, clubbing or another events where you would like to get attention and "stand out of a crowd". It is also a bit more difficult to create than smokey eyes but the result is definitely worth the effort.

I have seen similar look which inspired me to create this one on YouTube channel created by Maya Mia (check her channel, she's awesome!) only she has made the crease less dramatic and brown - I made my much thicker and darker. She has used matt mint green/aqua shadow as a main colour. I went for vibrant shimmery orange just to make something different and something out of my comfort zone because I usually don't use orange.

Also, this eye look won't show much with your eyes open, however, it will totally stand out when you close your eyes or when you blink:-). If you like you may make it even more dramatic with using false eyelashes (same as Maya Mia did) or you can tone it down by making crease brown instead of black and slightly thinner and not as thick as I did.

You can also go for different eyeshadow colour - you can choose something which will compliment your eye colour or something as contrast to it. Orange will absolutely bring out your eye colour if you have blue or grey eyes but it is also very nice with green and brown eyes. I recommend to use very light or bright colour for cut crease look to create a contrast to dark crease. This would also look great with white. pink, aqua blue or any colour which you normally don't use as a main colour. To make it more clubbing appropriate you may also use glitter on top of the eyeshadow. You can be as creative as you like with this look.


Products used:
face:
GOSH Velvet touch foundation primer
Vichy Dermablend Fluid Corrective Foundation 16HR 25 Nude mixed with:
Max Factor Lasting Performance 101 Ivory Beige foundation
Max Factor Mastertouch Under-eye concealer pen 303 Ivory
Maybelline Super Stay 24H Concealer 2 Light
Sleek Face Form Contouring and blush palette 373 Light
Vichy Dermablend Setting Powder (loose)
brows:
Catrice Eyebrow Set Powder
Anastasia Beverly Hills Dipbrow Pomade Chocolate
eyes:
Catrice Kohl Kajal 040 White
L’Oréal Gel Intenza Eyeliner 01 Pure Black
(into crease, on top lash line, into waterline)
Sleek I divine Ultra Matts v2 palette
Sleek I divine Sunset Palette
Max Factor Clump Defy by false lash effect mascara
L’Oréal Volume Million Lashes So Couture mascara
lips:
L’Oréal Infallible Lipstick 312 Incessant Russet

Thursday, September 11, 2014

Photoshop lies

Once I was browsing through YouTube and I found several interesting videos entitled "celebrities photoshopped" and "celebrities without make up". Honestly, I couldn't believe my eyes. I have found women which world presents as an examples of beauty, icons, idols, "the most sexy people of the world" etc. looking just like any other common women easily found in shops or on the streets. No perfect skins, no perfect shaped bodies, no perfect make up...it really made me think.

I know that nobody is perfect and I am not jealous of celebrities because they are dealing with problems I really wouldn't like to have and I don't think that money they make are worth it (no privacy, paparazzi hiding behind every bush, every step they make is watched and judged by public, stalkers, mentally ill fans, made up crap in magazines, finding out about cheating boyfriends from the press, etc).
Also, I have never been a big fan of celebrities because I don't find them that special. Maybe some of them might be great singers or great actors and they may appear absolutely gorgeous on photo's or on TV but most of the time "products" they sell aren't there.
In this article I will be talking specifically about beauty or so called beauty.

I will never understand why are they trying to be perfect. And I will also never understand why magazines force people to be perfect. Why do they have to photoshop every single photo they have and try to convince us that every celebrity woman has an amazing skin, that none of them have acne, scars, wrinkles, dark circles, no under eye bags etc....? Or why do they want us to believe that a 55-years old woman has skin as a 20 year old one?

Of course, it's all about money. If some aged celebrity would actually admit to her age and appear on photos the way she actually looks like, nobody would find her (appearance) any special, therefore nobody would buy her photos and nobody would spend lots of money trying to look like her.

Still, I find it ridiculous because if the celebrities let their photos be photoshopped and published making the world believe that they actually ARE perfect, then it puts big pressure at them to actually DO look perfect the entire time they are at the public (with new photo technology and special equipment of paparazzi they have to look perfect even at home).
Well, that's the choice they make. What I find very unethical is, that there are so many women very frustrated because they do everything they can to look like those celebrities without positive result - not realising that those "perfect" celebrities don't exist and they have been lied to.

Yet, what pisses me off even more - not that I have been pissed so far, but I'm getting there - are commercials. For example - a mascara commercial. The
commercial shows that if you apply that specific mascara on your lashes, they will become very thick and long. They put on nice pictures "before" and "after". Only, at the "after" picture the model has totally big fat FALSE lashes on. And they are pretending that it's absolutely natural and that the mascara is absolutely miraculous. I don't get it. Do they really think that we would actually buy it? Why can not they just pick a girl with beautiful lashes, let her put on that mascara and make pictures of it. It would look more believable and not so absolutely stupid as using false lashes pretending they are real.


Or another example - a face cream. On the commercial there is a beautiful young girl (of 15 probably) with beautiful flawless skin and text next to it says that with using that cream you will achieve perfect skin without any imperfections. They will even give you percentage of women for which it worked. But, they also put on a little star * behind a text and if you search for that star * you will find it somewhere hidden with very small letters that says *TEST IN VITRO what actually means that the test is" taking place in a test tube, culture dish, or elsewhere outside a living organism."  So that would mean that those women they were referring to were either non living organism or possibility number two - it's total crap. Besides that, the photo they have used is also photoshopped. They made her skin look super smooth, there are not even pores showing which is absolute proof that this specific photo has been adjusted with a computer program. FYI, I am using the term "photoshopped" because most people know that adobe photoshop is a computer program used for adjusting photos and pictures and you can do pretty much everything you want with it. Of course, nowadays there are soooooooooo many different computer programs specialised in this area used by real professionals. 

So, after disappointing myself with finding out that famous women aren't that pretty and every magazine photo they are at is probably photoshopped, I decided that I will photoshop one of my photos. I have always wanted to have beautiful flawless skin without any acne scars, pigment spots, freckles nor mimic lines and voila - now I have it! Just few minutes on my computer and if you wouldn't know me you would think that I have perfect skin.....Oh, and I have also make my skin tone less red and I made my eyes greener than they actually are:-)


BEFORE
AFTER

So, what I wanted to say with this article, my dear readers/followers/friends is PLEASE THINK! When you are reading a magazine or watching TV and you see some celebrity and you sigh "wow, she is so beautiful, I wished I look like her..."and then you look in the mirror and what you see is so different that it makes you feel sad/depressed and then you go to the shop and you see her face on some product and you think about buying it so you would look like her - THINK! She probably doesn't look like that in real and without make up you probably look better than her and the product she sells might be a total lie too. If you really want to know if some product is worth buying I recommend to check it on YouTube, there are girls and women reviewing pretty much everything and there is a bigger chance that they are telling the truth than celebrity in the commercial or commercial itself with their photoshop lies....


Sunday, September 7, 2014

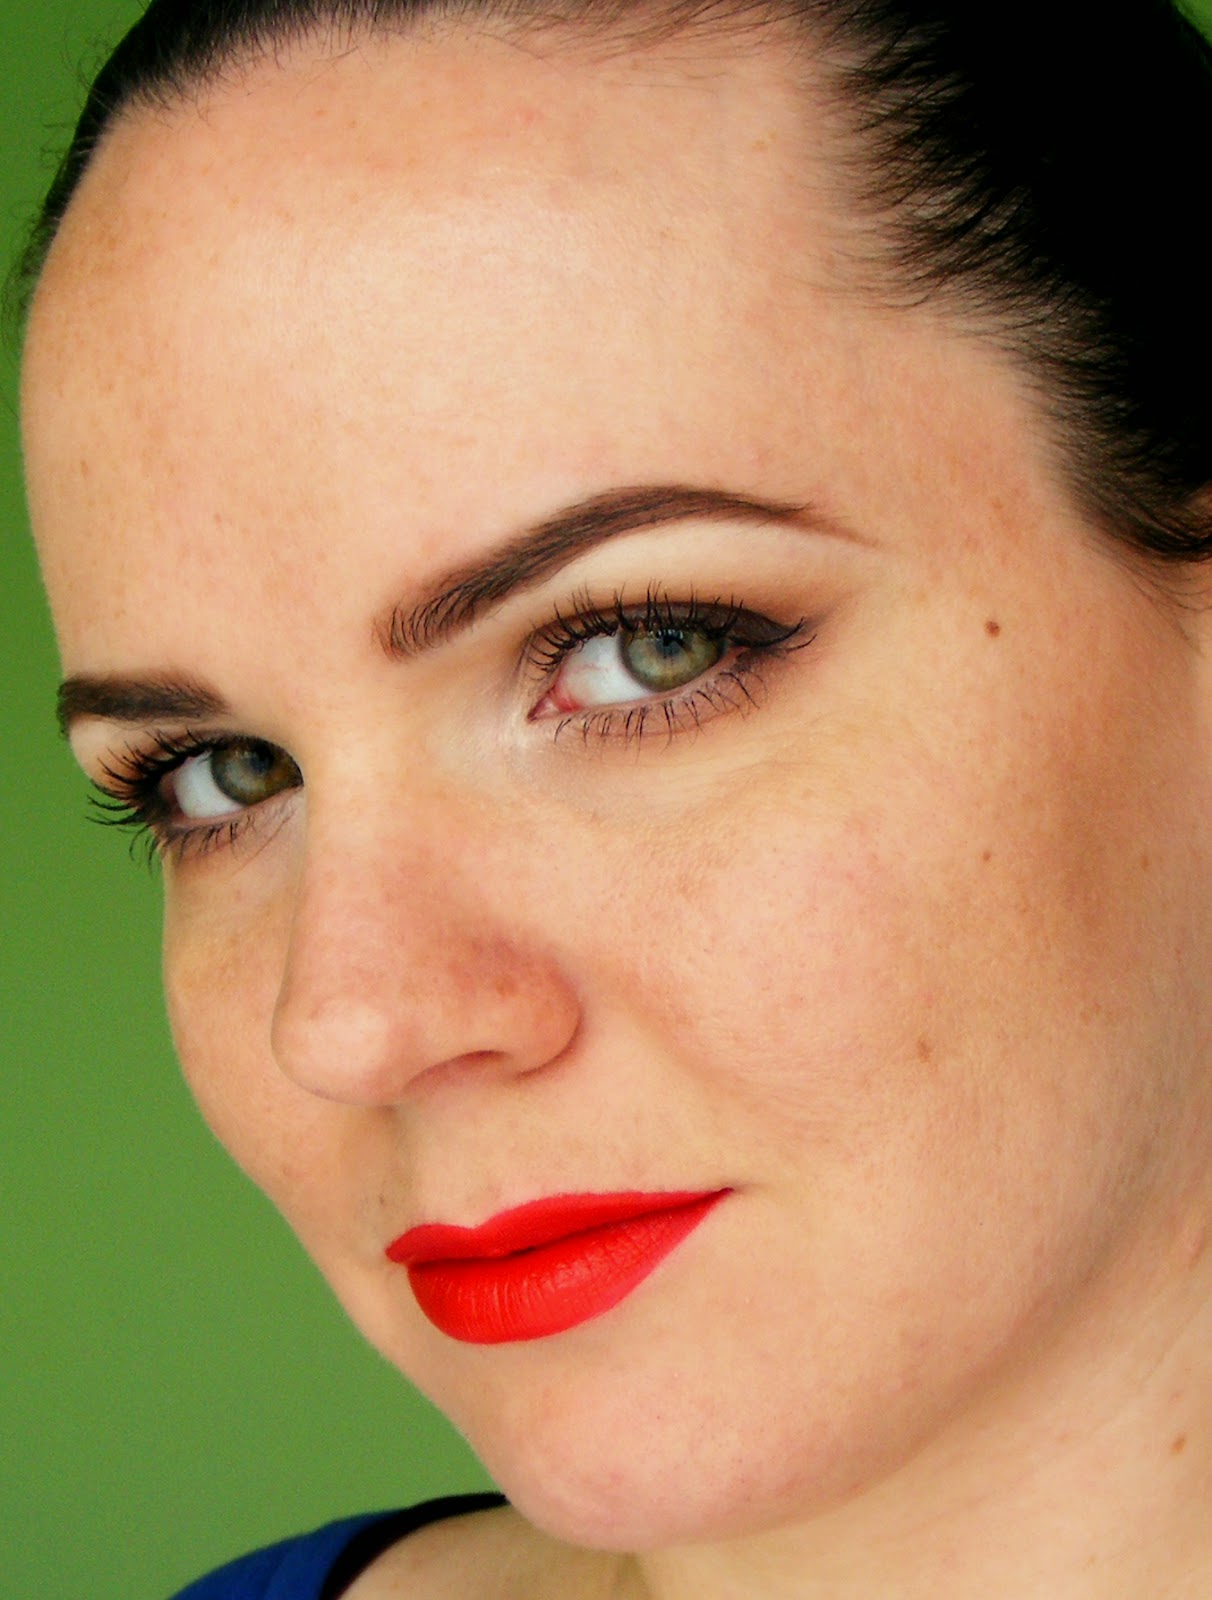
50's pin-up

 I absolutely adore 50's pin-up looks because they are so simple looking. They are pretty much only three things going on - brows, bold eyeliner with false lashes and red lips, everything else is tuned down.

With this look I have started with face primer from Gosh and my all time favourite foundation from Vichy Dermablend in shade 25 Nude because it has so light formula and very heavy coverage (which is something I require) so I don't have to apply much of it. I did light contouring with medium taupe brown eyeshadow.
For the eyes I have started with base for which I used Maybelline Super Stay concealer in shade 2, then I apply white Sleek eyeshadow (using Matt v2 palette), then I applied light beige and darker beige mixed with brown into crease (from same palette). I mainly concentrated onto eyeliner - I used L'Oréal gel liner with black matt shadow on top of it to avoid shine and also protect from creasing. Then I applied thin layer of mascara and I used false half lashes only for outer parts. In my opinion half lashes look more natural and not so obvious than full lashes. After lash glue dried I apply bit more liner on top of it just to hide it (very important step if you use false lashes). Than I applied white pencil into waterline and mascara on bottom lashes.
For lips I have used Maybelline Super Stay 24H, my absolutely favourite lipstick so far in shade 510 Red Passion and I went bit over the line (on op lip), just to see how would it look like because my model has top lip bit smaller than bottom one. And, as I have mentioned in my earlier posts, when using bright or dark lipsticks it is mostly very convenient to extend it slightly more over the line as you might usually do with nude lip colours because they optically make lips look smaller.
I finished off with brows, I used as always my Anastasia Dipbrow pomade in shade Chocolate, which fits the most of my models (as long as they are brunettes). I tried to keep the natural shape of my model's brows but still I tried to make it more 50's looking - which is neat and bold and quite arched, so I came up with kind of a compromise. I used clear brow gel to make it more natural afterwards.


Tuesday, August 26, 2014

Celeb look: Iggy Azalea inspired (graphic liner & bright lips)

This look is very basic yet classic and it reminds me of  50's if you would substitute pink lips with bright red. I really love fact that vintage fashion and make-up are "in" again, with modern twist but also authentic variation, which I personally like more. It is very easy to achieve this look, only tricky part could be the black graphic liner but once you learn the trick, it's simple. You might find lots of youtube tutorials how to do black liner, I personally do it this way:  http://youtu.be/irIABAPb_fo?list=UU6jgzx2g3nlbaYkd8EMweKA
I started first with applying primer all over my face (use the one which works with your skin the best, for me it's GOSH velvet touch).First of all I have applied concealer all over my eyelids (top and bottom) and I set it with matt eyeshadow which is similar to my skin tone. You can also apply some darker shadow to create more dimension to your lids (especially with hooded eyes).Then did my eyeliner with using L'Oréal black gel liner and I applied black matt eyeshadow on top of it. Then I applied foundation. I wanted something lighter than what I would usually wear, so I mixed 2 shades - Max Factor Lasting Performance in shade 101 (which is the lightest I could find, unfortunately it has red undertone, which is not matching my skin tone) and Vichy Dermablend in shade 25 Nude (this one is perfect match for my skin in summer). I set everything with L'Oréal True Match pressed powder and I did some light contouring under my cheek bones (towards temples as always). I didn't use any blush. After all "powdering" was done, I filled-in my brows, using Anastasia Beverly Hills Dipbrow pomade in Chocolate and I applied my favourite mascara - L'Oréal Million Lashes So Couture. I finished off with lipstick. I used this gorgeous bright hot pink from L'Oréal Infallible in shade 121.
BTW I have NO IDEA who Iggy Azalea is, I believe she's singer, but I'm not sure, therefore I can not say that I am a fan of her or anything like that. This picture was sent to me with request to do this look, so I tried to create a look inspired by this picture. I also didn't try to create exactly same look, I never do, and I also never do celebrity looks but celebrity INSPIRED looks (if it makes sense), for me it does make difference. I really hate to copy celebrity looks from 2 reasons - first of all - THEY ARE NOT REAL. All looks in magazines, or social media has been "photoshoped" which means graphically adjusted, therefore it is impossible to create exactly the same look -  and second reason why I don't like to re-create celebrity looks is that I don't have EXACT SAME PRODUCTS as have been used on those celebrity photos. You can try it with similar products but you won't achieve the exact result. So that is bit of an explanation why you won't find authentic celebrity looks on my blog.

Monday, June 30, 2014

3 looks in 1 (using W7 In The Buff)


For the first look just apply your foundation, set with powder, contour and highlight as usual, fill-in your eyebrows (for this look I have used Anastasia Dipbrow pomade in Chocolate). I used light brown eyeshadow to define my crease and light shimmery white (with salmon undertone) to inner corner of my eyes and under the browbone as well. Then I applied some mascara (Million Lashes So Couture from L'Oréal). Afterwards some neutral light brown lipstick (24h Super Stay from Maybelline). To finish off I applied nice glowy pinky blush. You can see that creating this look is nothing extra difficult and pretty quick. This look is very daytime appropriate, for work, school, pretty much any occasion where light make up is required.


If you wish to turn this look into something more outstanding and bit more dramatic all you have to do is apply thin line of black eyeshadow along the lashline and extend it towards your temples a bit which gives you nice cat-eye liner. And there you go - look number 2 is achieved!
It is very simple and quick as well, just make sure to use correct brush for applying your black eyeshadow because if you use brush which is too soft or too stiff you might get nasty fallouts all over your face and then it might be very tricky to remove it. If your (black) eyeshadow tends to leave fall outs, you might have to apply it while holding tissue under your eye (or use shadow shields). Don't make the line too harsh neither too thick. If you find the line not natural or too harsh, just smudge it a bit. You might also substitute black eyeshadow with black gel or pen liner.

If you want to switch from day time to night time look you might be able to do it in few minutes. All you have to do is apply black eyeshadow into outer-V and bit into the inner corners as well, make sure it's blended very well. To make it more vibrant, apply shimmery bronze or brown shadow directly onto centre of your eyelid (the moving part of course). Blend it with black shadow so transmission is smooth and you have no harsh lines. After you are satisfied with intensity move along to lower lid. Apply black shadow all over the lower lid and blend it. You might apply the shimmer bronze of brown on top of it. Use black kohl pencil (or gel liner) onto waterline (top and bottom). I have also applied that shimmery salmon white shadow into inner corners once again for more bright look - you might skip this step of you want. Or you can use some light golden shadow instead. It would look nice too.
To create of these 3 looks I have used W7 In the Buff Palette which is perfect duplicate (much cheaper version) of Urban Decay Naked 2 palette I believe. You can use whatever palette (or single shadows) you wish, result will be same....
I hope you enjoyed this article and I'm looking forward to your comments!

Friday, June 6, 2014

Rainbow butterfly feat. Sleek Acid Palette

I was in quite creative mood today and I wanted to do some summer appropriate look including bright colours. Than it occurred to me that I have never actually used Acid palette for more than 2 years and I don't understand why - I totally love those neon shades. So here was a perfect opportunity to create something extraordinary with it - and this is a result!

For start I have applied white pencil all over my lid and smudged it with my finger. Then I started with bright yellow shade in my inner corner. Then followed orange, bright pink and fuchsia. I used sponge applicator (which I never use on regular basis) for pressing shadow into the crease. Those shadows are very matt so it takes quite an technique to put them into lid the way they appear as bright as they supposed to. After applying fuchsia shadow into outer-V I took soft fluffy precision brush and blended the edges with white shadow. Then I blended violet shade into the fuchsia so it was nice transmission between pink and purple. Then I applied darker blue onto the outer-V which made violet shadow look more purple.

Afterwards I applied white pencil all along my lower lid and smudged a bit with my finger. Than I applied yellow shade into inner corner and light green thereafter followed by grass green shade. That shade I connected to the blue one which I applied into outer-V earlier.
Now was the time for foundation which is few shades lighter than my skin because I really wanted the colours to stand up against my skin. I chose Vichy dermablend corrective stick in shade 12 Opal. I set everything with a loose powder (Vichy dermablend as well). I used white eyeshadow from Acid palette for highlighting (under my eyes, on bridge of the nose, forehead, above my lid and on chin).
I continued the eyes with creating very intense lines with gel eyeliner. I used white pencil onto arch of my brow to make it less visible. I made the butterfly wings with green shadows on top and light blue on bottom and I made the lines around with gel eyeliner as well. I set all lines with black eyeshadow afterwards to make them look matt and very intense.
I finished off the eyes with black mascara (Scandal eyes form Rimmel) and some false lashes.
I used some light contouring but no blush nor highlight.

For lips I decided to create more "doll" shape with pink pencil and fuchsia lipstick into inner part.
I am very happy how did this look turned out. Hope you like it.