Friday, October 31, 2014

7 most common brow mistakes

I see so many times women with wrong shaped, or badly filled-in eye brows. It is a shame because such a mistake can ruin the entire look. No matter how perfect your eye and face make up is, if you have brows done not correct way, it will just not look good.
In this article I will be talking (writing) about 7 ways of wrongly done brows - ergo brow "fails". I will try also to explain why are those specific brow styles simply WRONG.
To show you what I mean. I did my brows the "correct" way (in my opinion), then I took the photo and I changed the shapes, thickness and color using online photo editor. I hope you enjoy this article,  and that you won't be offended if those mistakes are concearning you. In the end of this article I will mention mistakes I made in my brow routine. Here we go.

Fail nr. 1:  NO BROWS

No brows means that all face, lip and eye make up is done but brows are not filled-in, not brushed or anything else what you might do to enhance them. You can see if you look to this picture that something is missing - without defined brows look doesn't look complete.
Most of the women don't have perfect brows - neither do I. The hair is not thick enough, there are some sparse areas, the hair doesn't grow much at the ends of the brows, so they look short. Therefore I have to fill them in, to give them shape and bit of a color, because they are too light and my hair is black. About the correct color of your brows I will talk later.
Only a few of the women who have very nice and full brows can afford to not doing anything with them. Yet I recommend to at least brush them through with clear brow gel or mascara, it gives them nice shape and it makes the hair going one direction.
Fail nr. 2: BROWS TOO FAR FROM EACH OTHER

This is one of the WORST things you can do - not fill-in your brows close enough which will give you terrible clown look. Please, don't do that.
I know, Joan Collins also had brows like that in Dynasty, but yeah, there are no 80's anymore, so such a thing is definitely not acceptable in 2014. Still, I've even seen make up artists with brows so far from each other, and I don't know what to really think about them then - poor judgement of what fits to them or simply not knowing much about beauty? It's just plain wrong.
There are theory's on where your brows should begin. Of course, you don't want to put them too close to each other because it will give you a angry look, and that's something you don't want.
I've seen one quite good "pencil technique" where you simply put a pencil in front of your nostril so it's straight and you just follow it's line and there should be your brow starting.
It might fit to most of the women, except those with close set eyes. Then their brows should start above their inner corners of their eyes.
Another technique would be to frown as much as you can, and where the brows start to wrinkle in the middle, there should be your brows starting. And that's also your natural brow line. It might be not 100% accurate but it might help you to figure out were should your brows start.

Fail nr. 3: CLOWN BROWS

It says for itself - there type of brows will make you look like a clown. These brows are TOO THIN - it is just one line, same thick at the beginning as at the end and which is same bad or even worse - BAD ROUND SHAPE. I personally really hate round brows. It looks like you would put a glass on you eye and just traced its shape. That's not how brows should look like.
Too thin brows will make you look older - that's for sure. It was a big hit in some decades, I still remember the 90's when everybody just over plucked their eyebrows till they were super thin, even barely visible. Even worse, some women just plucked them totally gone and drew them on with a pencil - just like in 1930's and 40's. It really doesn't look natural nor nice. If you have only few hair on your brows or you don't have any hair on your brows at all, you might try some brow pomade (for example dip brow from Anastasia Beverly Hills or Make up Forever Aqua Brow, and from cheaper brands Sleek makes pretty good brow wax), with which you can draw brows on and blend it nicely (which you can't do with just brow pencil). Try to draw brows thicker in the inner corners, slimming down towards the arch and from arch till outer end slimming even more. The perfect brows should have a shape of wings of flying albatross or eagle. That brings me to issue nr. 2 which is shape. I have seen girls with brows plucked to round shape - it might be probably because rumour says that you should pluck your brows only from the bottom, never from the top. I personally find this a nonsense. You can pluck your brows from any direction you want to give them nice shape. If your brows are growing naturally high and you want to give them nice "flying wings" shape, you can easily pluck from top as well. Anything which avoids the shape like it's on this photo.


 Fail nr. 4: WEIRD SHAPE

This is another example of not good shape. It is not natural, it gives a face not nice expression and the shape itself is just weird. It's definitely NOT flying wings shape.
Another thing which makes it wrong is that slimming of the brow is not smooth - brow is slimming towards the arch quite fluent but from the arch till the end is way too thin.
This shape is also more of a "straight" brow category, which I have nothing against - straight brows are awesome if they fit you but you can see on this picture that this shape really does not fit me.
Easiest for you to find out which brow shape fits you the most is make a photo of it and make a photo of another one - or draw your brows on with photo editor and then you can decide which brow shape will fit you and which won't. I recommend to simply stick with what you naturally have. If you have naturally straight brows, go for that shape but if your brows are naturally arched and defined, stay with that shape.


Fail nr. 5: WAY TOO DARK

Here you can see right away what is wrong - the brows are too dark. Although they match my hair color but they don't match my skin color.
The key for finding out how dark the brows should be is to compare hair color and skin color and find a compromise.
If you have black hair and dark skin, black brows are okay. But if you have black hair and pale skin, you have to go for brown or dark brown - something which won't look too harsh on your skin.
In general - if you are brunette, your brows should be 2 or 3 shades lighter than your hair. If you have light hair, then they should be 1 or 2 shades darker than your hair. But again - any coloring you do on yourself has to be in harmony with your skin.


Fail nr. 6: TOO SHORT

the pencil technique
Here we have brows which are too short. Too short means that they are ending before outer eye corner. With finding out where the brows should end we can use the pencil technique again. Put pencil so it goes from your nostril, along outer corner of your eye and there you will see where should your brows end. Pretty easy.
But again, don't draw your brows too long. It was very fashionable in 30's and 40's (or even earlier, I might be wrong), the era where women drew their brows on with a pencil and they drew them so long that it gave them super "bored" look - that's what they were actually going for.
Now, we the most certainly don't want to look bored. We want to look pretty, happy and healthy.


Fail nr. 7: TOO LIGHT

We have already talked about proper color of the brows. You could see how does it look like if we use too dark color for the brows. Here, you can see what happens if the brows are way too light. If I would have light brown or blond hair, it would be okay. It is also not such a big deal if you would look only to my face. But, if I would have my hair loose than you would see that it doesn't look good with my black hair. It would even look quite funny I think.
So, keep in mind that there really should be harmony between your brow color, your skin color and your hair color.
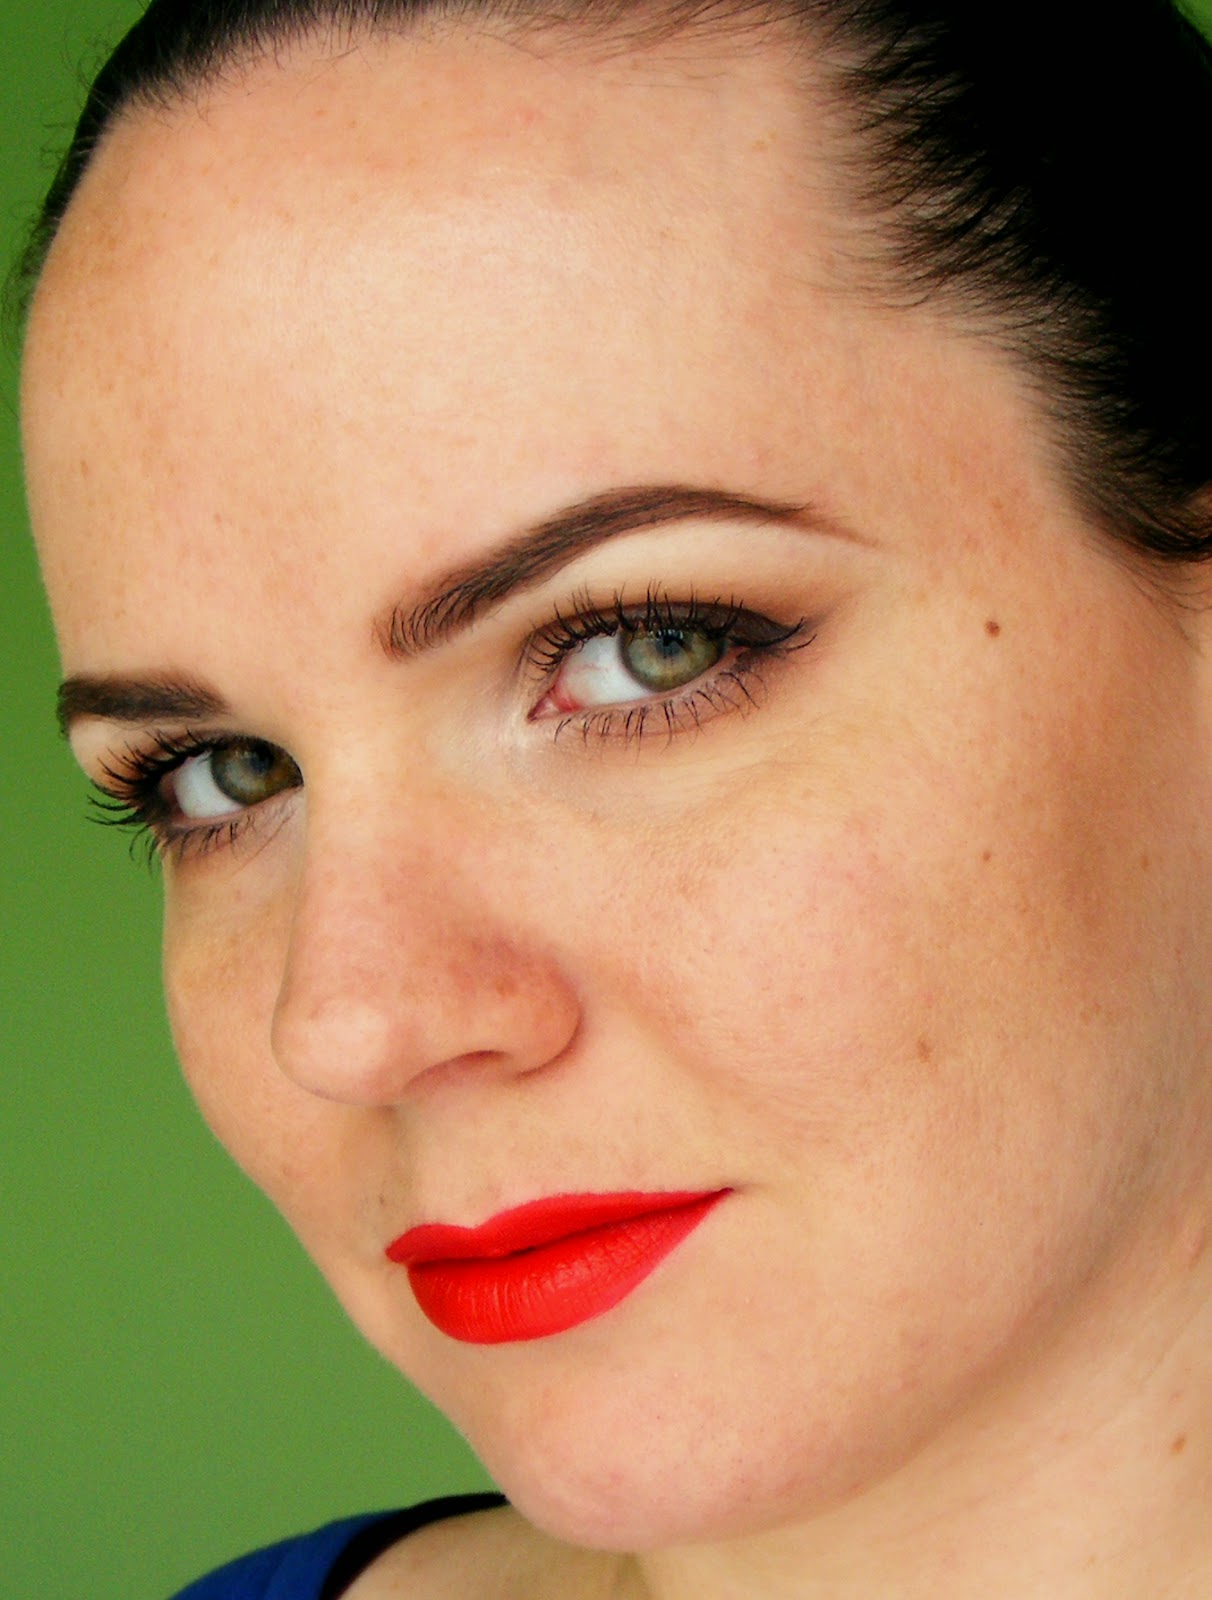


THE "PERFECT BROWS"

This is the perfect shape of brows for my complexion. The color is right, not too dark, not too light, thickness and length is ideal. Although, I had a much struggle with my brows in my pass.
When I was younger, I plucked my brows way too thin.I was filling them in with dark brown pencil. It wasn't bad but it definitely made me look older. Then I started to fill in my brows thicker but I was using very rich dark brown eyeshadow so it was looking very obvious and very harsh and the first thing what people would notice on my face were my brows.
Then I discovered Catrice brow powder in perfect taupe brown colour, so it wasn't too warm or too fake looking, so it made my brow routine much easier and results much more natural. I also started to use small angle brush for application - which is much better than my previous flat brush which didn't make very thin lines.
Then I have purchased my first dip brow pomade from Anastasia Beverly Hills and it was something very new for me. With creamy gel you have to do your brows totally different than with powder, and you can not make any mistakes. After some time I learned how to do that properly, so now I don't have a problem with it anymore. Although, I still think I should switch the color from Chocolate to something darker like Dark brown or even Ebony.
Till some time ago I was making my brows way too close to each other (as you can see on my older posts).  It made me look older and angry. I admit. Now I can see it much better because I know what I did wrong and now I can see the difference much better. I hope you can also learn a little bit more about mistakes you should not be making and I hope it makes you look better and also feel better. I know that beauty is just a matter of taste but I think that each of us should just try to look the best we can....

Thursday, October 30, 2014

Cobalt ombre eyes - 4 shades of blue

I have made this look already earlier on my sister, but photo's didn't come out good so I decided to re-create it again with little changes. I was quite out of my comfort zone - I normally never wear blue eye shadows, because I have feeling that it doesn't really fit with my eye color, but after I saw these photo's I thought that it is not so bad.  Anyway, you can do this look with any eye shadow color you want - purple, green, pink...whatever you like. I really love this shade of blue (cobalt). It is so hard to find it and if you would find it in this specific colour and you would put it on your eyes, it would still look different. Therefore I have used 4 different shades of blue to achieve perfect cobalt color. The point is that you start with the darkest color which you apply lowest (right above the lash line) and then you apply lighter shades on the way up (to the brow bone). The key is to cross those colors a little so the transition will be smooth and almost invisible. If you do that well, you won't even see that there are 4 different colors on the lid.

I started with Sleek Primer Palette, applying blue primer all over the lid with flat synthetic brush. Then I started applying eye shadows - first I applied dark navy blue from Sleek The Original Palette. I put it all along the lash line, from inner corner to outer corner, to approximately half of my eyelid - almost as a very thick eyeliner. Then I put blueberry shadow on from Sleek Candy Palette which is 2 or 3 shades lighter then shadow I used earlier. I started to put this shadow where the dark one ended and little bit over it, so the transition will be smooth without any harsh edges. I applied this shadow all over the lid as well and I stopped where the crease begins. Then I took turquoise shadow from The Original palette and I put it into the crease. When I had the shape I wanted, I blended the edges with matt light blue shadow from the Candy palette. Then I put matt light beige shadow on top of light blue to neutralize all those blue colors so they don't go all the way up to my brow bone. Then I put white matt eyeshadow on my brow bone.
Then I cleaned up fall outs with dump cotton pad and I swept it under my eyes along the lower lash line all the way out towards my brow to create sharp edge. Then I applied white kohl pencil into my waterline and bit into inner corners of the eyes. Then I put white matt shadow on top of it (in the inner corners). Then I put warm matt chocolate shadow all along the lower lash line and out to meet the blue eyeshadow. Then I applied matt black shadow all along the top lash line and I extended it outwards so it darken the outer edge and I applied a bit on the bottom lash line as well.
Then I moved to the rest of the face.
First I applied my primer all over the face, then I put concealer under my eyes and I mixed a bit of it with my foundation and I applied very thin layer all over my face. Then I set everything with a loose powder, I did a bit of contouring under my cheekbones and bit of a highlight on my cheekbones. I didn't use any blush. I applied very generous amount of mascara on my top lashes and I did my brows while it was drying. Then I put a second coat of mascara and I put one coat on bottom lashes too (with different mascara). Then I put a lipstick on and voila - make up ready:-)

Products used:

Face:
GOSH Velvet touch foundation primer
Vichy Dermablend Fluid Corrective Foundation 16HR 25 Nude
MAC Pro Longwear Concealer NC 20
Vichy Dermablend Setting Powder (loose)
Sleek Face Form Contouring and blush palette 373 Light

Eyes:
Sleek Primer Palette
Sleek The Original eyeshadow palette
Sleek Candy eyeshadow palette
Sleek Ultra Matts v2 eyeshadow palette
Max Factor Wild Mega Volume mascara (top lashes)
Max Factor 2000 Calorie Dramatic volume mascara (bottom lashes)
Catrice Kohl Kajal 040 White

Brows:
Anastasia Beverly Hills Dipbrow Pomade Chocolate

Lips:
Maybelline Super Stay 24 Color 615 Soft Taupe

Friday, October 24, 2014

Fall plum/aubergine reverse smokey eyes feat. Sleek Vintage Romance eyeshadow palette


Fall is here and autumn trends as well. There would be no autumn without using lots of plum, violet, burgundy and aubergine shades - on lips, on eyes, on cheeks...everywhere.  I absolutely love these colors and I wear them on daily basis - mostly on my lips. I think it just looks amazing in combination with white or light skin. If you have also pale skin and dark hair, it will fit you perfectly for sure.
I thought that I will kind of combine those 2 "hits" of this season - plum eyes and plum lips.
I have used mainly Sleek Vintage Romance eyeshadow Palette which was released in autumn last year and it has mainly golden and plum-pink shades. There is also 1 silver shade which I used into my inner corners, dark gold one I put all over my lid area and I used plum-pink into my outer V's and all along the bottom lash line. That is also reason why is this look called "reverse smokey eyes" - which means that all the accent is on the bottom lid and lash line. The darkest colour (black gel liner) is in the waterline, then there is same plum color as on the outer V and it is blended with dark gold color I applied on the top lid. It is not very difficult to make, the trick is that all the colors have to be blended well and they have to fade out gradually - the transmission between colors have to be seamless.
With this look are both eyes and lips very strong therefore the colors have to match with each other. It doesn't specifically mean that they have to be exactly same colors, but they have to have same undertones (in this case blue) and be on same color scale (in this case cool).
Don't go too crazy on brows because with too defined brows it may look waaaaaaaaaay over done.
Keep them simple. I used dark grey shadow and clear brow gel for more natural look.
I applied quite generous amount of mascara, you can even put on false lashes - it would look even better and more glamorous.
Make sure that you skin looks as good as possible - conceal all blemishes, discolorations, dark circles, pigment spots, etc. Don't put on too much foundation thought, the skin has to look natural. I used the thinnest layer of full coverage foundation mixed with concealer. I always apply foundation just with my fingers, never with brush because with fingers I can control the amount better. With the brush I always apply more than I want to.
I did very light contouring and very very light blush because I wanted the lip color to stand out the most.


Products used:

Face:
GOSH Velvet touch foundation primer
Vichy Dermablend Fluid Corrective Foundation 16HR 25 Nude
MAC Pro Longwear Concealer NC 20
Vichy Dermablend Setting Powder (loose)
Sleek Face Form Contouring and blush palette 373 Light
Sleek Pomegranate 923

Eyes:
GOSH waterproof eye shadow stick “Love that Gold!”
Sleek Vintage Romance 
Sleek Ultra Matts v2
L’Oréal Gel Intenza Eyeliner 01 Pure Black
L’Oréal Volume Million Lashes So Couture mascara

Brows:
Rimmel mono matt eyeshadow dark grey/black
Catrice clear brow gel

Lips:
Maybelline Super Stay 
24 Color 240 Plum Seduction

Thursday, October 9, 2014

Maybelline Super Stay 24 hour Color Lipsticks

 I have already mentioned these lipsticks in one of my previous reviews so I am not going to write it all over again. As I said before, these lipsticks are same kind as L'Oréal's Infallible and Max Factor's Lipfinity. The whole point is that these lipstick are not smudging, staining nor moving and once you apply them they WILL stay on until you remove it. The formula is fluid, application is similar to lip gloss and it dries on lips into matt finish. Down side is that it doesn't feel nice on lips when you try it first time - it is very very dry - but after some time you can get used to it. However, there is a balm on the other side of the lipstick which you should apply once the lipstick is totally dry. That makes it bit better. Also, taste of that balm is not one of my favourite.
Though after you try these kind of lipsticks you will see how nicely they stay on and you will never go back to common lipsticks any more..at least I didn't.
Another advantage of these lipsticks is that they are very pigmented and you can also layer them to achieve higher intensity. Mostly one layer is enough to cover up your natural lip color but if you wish to have darker or more intense color you can easily apply 2 layers.
I first start with filling my lips with surface of the applicator, then I outline them with very tip of the applicator. I wait till it's all dry and then I apply one more coat all over the lips. With darker and more intense colors I also use very precise small lip brush, I dip it into lipstick and I go over the edges of my lips to create very fine precise outline. Remember, more dark and intense color you are using, more precise you have to be because it will show. I also usually go bit over the natural line of my lips to make them appear bigger and fuller (which looks always better with using dark colors).
On the pictures below you will see my collection of Maybelline Super Stay 24 Lipsticks with numbers and colors - which are available in European market. Shades and numbers are different for US.
Maybelline Superstay 24 hour Color 585 Burgundy

Maybelline Superstay 24 hour Color 260 Wildberry

Maybelline Superstay 24 hour Color 510 Red Passion
Maybelline Superstay 24 hour Color 240 Plum Seduction

Maybelline Superstay 24 hour Color 615 Soft Taupe
Maybelline Superstay 24 hour Color 340 Absolute Plum


Wednesday, October 8, 2014

Rusty brown & pop of green (Sephora Endless Color Blockbuster palette)


I really love warm brown eye shadows but I was bit afraid to use it because it kind of made me looking sick. It is very tricky to use warm tone eye shadows for women with cool undertone skin. My skin is neutral though but it is still quite difficult for me to use warm browns. Therefore I have tried this look - warm brown with red undertones blended with orange and pop of cool green into inner corners to tone down all the warm colors, For this look I have used my Sephora Endless Color Blockbuster Collector’s Edition Makeup Palette which I get as a present quite some time ago but I actually haven't use it that much. I was always used to work with Sleek eye shadows which are extremely pigmented so these Sephora shadows seemed not that good to me. But now I have found out that these shadows are perfect for blending and I have to build the color up. You won't get much of a pigmentation just with one sweep (as you normally would with Sleek shadows) but you can layer the colors on top of each other which creates amazing effect which was very surprising for me. I think this look turned out very well and I am definitely going to use this Sephora palette much more often.


Products used:
Face:
GOSH Velvet touch foundation primer
L’Oréal True Match C2 Rose Vanilla
MAC Pro Longwear Concealer NC 20
Vichy Dermablend Setting Powder (loose)
Sleek Face Form Contouring and blush palette 373 Light
Sleek Suede 921

Eyes:
MAC Pro Longwear Concealer NC 20 (as a base)
Sephora Endless Color Blockbuster Collector’s Edition Makeup Palette 2010 L’Oréal Gel Intenza Eyeliner 01 PureBlack 
Catrice Kohl Kajal 040 White
L’Oréal Volume Million Lashes So Couture mascara

Brows:
Anastasia Beverly Hills Dipbrow Pomade Chocolate

Lips:
L’Oréal Infallible Lipstick 312 Incessant Russet
with rusty brown eyeshadow from Sephora palette on top of it:-)

Tuesday, October 7, 2014

How to fix damaged hair over night

Lots of us are from time to time experiencing damaged hair, split ends, dry and weak hair without shine and all those kind of unpleasant and irritating issues which keep us further and further from perfect healthy shiny hair.
The most common and most drastic solution is cutting. For women who want to have their hair long or as long as possible cutting is very undesirable. Therefore they keep on trying out new and different products on the market which promise to fix all those above mentioned problems.
I have tried several of those products but I haven't find anything extraordinary which would be worth of mentioning. I have found one product though, which really DOES make difference. And it is quite cheap and you can purchase it very easily. I am talking about SWEET ALMOND OIL.

One of the best qualities of almond oil is that is 100% natural - which means there are absolutely no chemicals added. ( I am using Sweet Almond Oil from Jacob Hooy), There are no fragrances, no alcohol, no silicone...absolutely nothing which would be in any kind not good for your hair. Therefore you can never go wrong with natural product in comparison with factory produced item.

Another advantage of almond oil is that it deep conditions hair and you will see the difference after only 1 use. Of course, if you will use it frequently, you will definitely get healthy shiny hair.
Although I am not talking about any miracle. If your hair is heavily damaged or "burned" from bleaching almond oil won't be able to make your hair absolutely healthy or extremely shiny.

HOW TO USE IT:
Depending on your hair (and hair damage) use it 1 till 4 times a week (you can even use it every day if you feel like you need to).
Warm it up in hot water (it is not necessary but it helps to penetrate the hair). Some people warm up oils in the microwave oven but I really don't recommend it ( there is a theory according to which micro waves are actually very bad for human body).
Brush your hair very good - there should not be any tangles.
Gently rub the oil on your hair - start about 10 cm from your roots and work your way down. You can put the oil also in your hair roots and massage your scalp if you have dry skin as well. I personally don't do it because my hair tends to get quite oily. I apply the oil only where is my hair damaged.
Be very generous, apply as much as you can. Your hair should be soaked with oil. Then you can braid your hair or tie it in a bun or do what you're most comfortable with and leave it in for 24 hours or longer if you like to. I mostly apply the oil in the evening and I leave it over night.
Then wash your hair with shampoo and apply conditioner as you normally would.

After I tried this almond oil treatment I could see the difference right away. Of course, my hair wasn't damaged too badly, but I had split ends and bottom section of my hair was very dry, not shiny and I could feel that my hair has lost elasticity. After 24 hour oil treatment my hair felt much healthier, shiny and was much easier to brush it. I am using this treatment approximately 2 - 3 times a month just to keep it healthy, shiny and to give it an extra boost of vitamins and moisture.

For more information about benefits of almond oil click here


Orange cut crease

This look is slightly more dramatic, very appropriate for party's, clubbing or another events where you would like to get attention and "stand out of a crowd". It is also a bit more difficult to create than smokey eyes but the result is definitely worth the effort.

I have seen similar look which inspired me to create this one on YouTube channel created by Maya Mia (check her channel, she's awesome!) only she has made the crease less dramatic and brown - I made my much thicker and darker. She has used matt mint green/aqua shadow as a main colour. I went for vibrant shimmery orange just to make something different and something out of my comfort zone because I usually don't use orange.

Also, this eye look won't show much with your eyes open, however, it will totally stand out when you close your eyes or when you blink:-). If you like you may make it even more dramatic with using false eyelashes (same as Maya Mia did) or you can tone it down by making crease brown instead of black and slightly thinner and not as thick as I did.

You can also go for different eyeshadow colour - you can choose something which will compliment your eye colour or something as contrast to it. Orange will absolutely bring out your eye colour if you have blue or grey eyes but it is also very nice with green and brown eyes. I recommend to use very light or bright colour for cut crease look to create a contrast to dark crease. This would also look great with white. pink, aqua blue or any colour which you normally don't use as a main colour. To make it more clubbing appropriate you may also use glitter on top of the eyeshadow. You can be as creative as you like with this look.


Products used:
face:
GOSH Velvet touch foundation primer
Vichy Dermablend Fluid Corrective Foundation 16HR 25 Nude mixed with:
Max Factor Lasting Performance 101 Ivory Beige foundation
Max Factor Mastertouch Under-eye concealer pen 303 Ivory
Maybelline Super Stay 24H Concealer 2 Light
Sleek Face Form Contouring and blush palette 373 Light
Vichy Dermablend Setting Powder (loose)
brows:
Catrice Eyebrow Set Powder
Anastasia Beverly Hills Dipbrow Pomade Chocolate
eyes:
Catrice Kohl Kajal 040 White
L’Oréal Gel Intenza Eyeliner 01 Pure Black
(into crease, on top lash line, into waterline)
Sleek I divine Ultra Matts v2 palette
Sleek I divine Sunset Palette
Max Factor Clump Defy by false lash effect mascara
L’Oréal Volume Million Lashes So Couture mascara
lips:
L’Oréal Infallible Lipstick 312 Incessant Russet